• Skip to primary navigation
  • Skip to main content
  • Skip to primary sidebar

Nourished not Famished

Real-life healthy changes, made simple and delicious.

  • Home
  • Recipes
    • Main Dishes
    • One Pan Dinners
    • Breakfast
    • Salads & Side Dishes
    • Soups & Stews
    • Snacks
    • Sauce/Dressing/Spices
    • Appetizers
    • Desserts
  • Real Food, Real Health
    • Why Real Food works
    • Getting Started
    • Meal Prep/Meal Planning Tips
    • The Other 3: Sleep, Stress Relief, & Movement
  • About
  • Contact
  • My Favorite Things
  • Nav Social Menu

    • Facebook
    • Instagram
    • YouTube

water

Quick-Pickled Cauliflower

By Jen

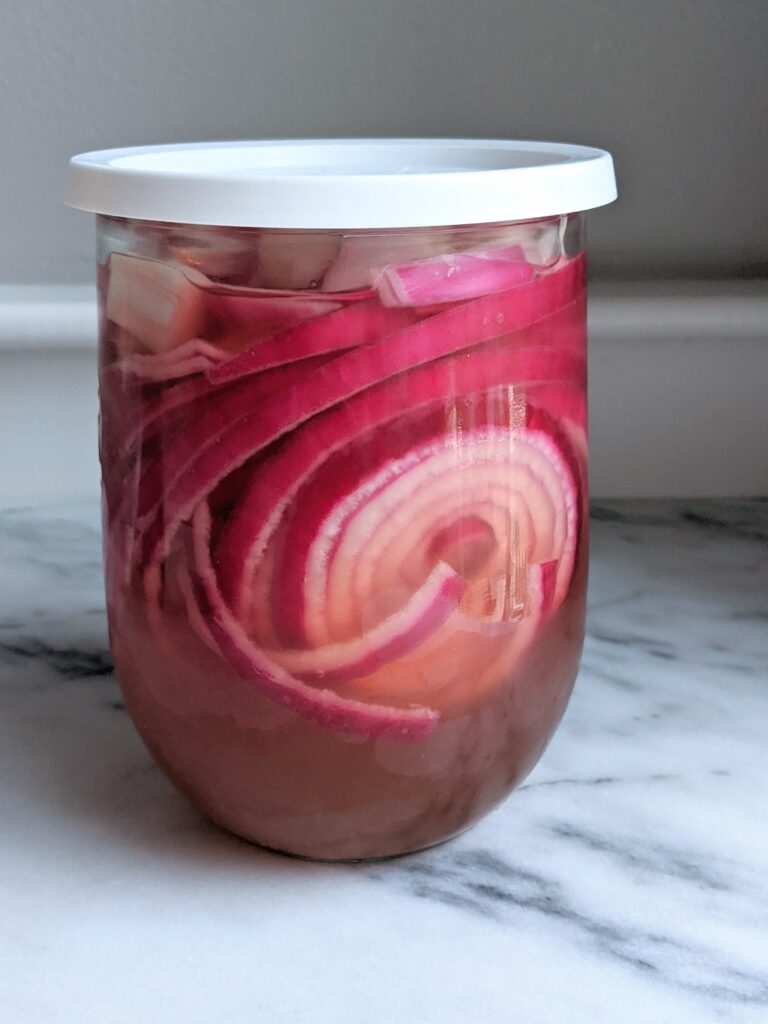
If you are looking to add more veggies to your plate, quick-pickled is a fun, easy method for preparing a big pile of veggies to enjoy all week long. Honestly, you can quick-pickle a wide variety of vegetables, but here I’m going to show you how I like to pickle a head of cauliflower.

It’s helpful to have an actual canning jar (that can tolerate high temp liquids) on hand like these 1.5 liter Weck jars and these easy, no-fuss lids so that you can pour the heated liquid directly into the jar, and store it in the fridge easily. No problem, though if you don’t have that. You can also use any pot you have on hand, and simply let the mixture cool before you pour it into your dish/jar of choice for storage.

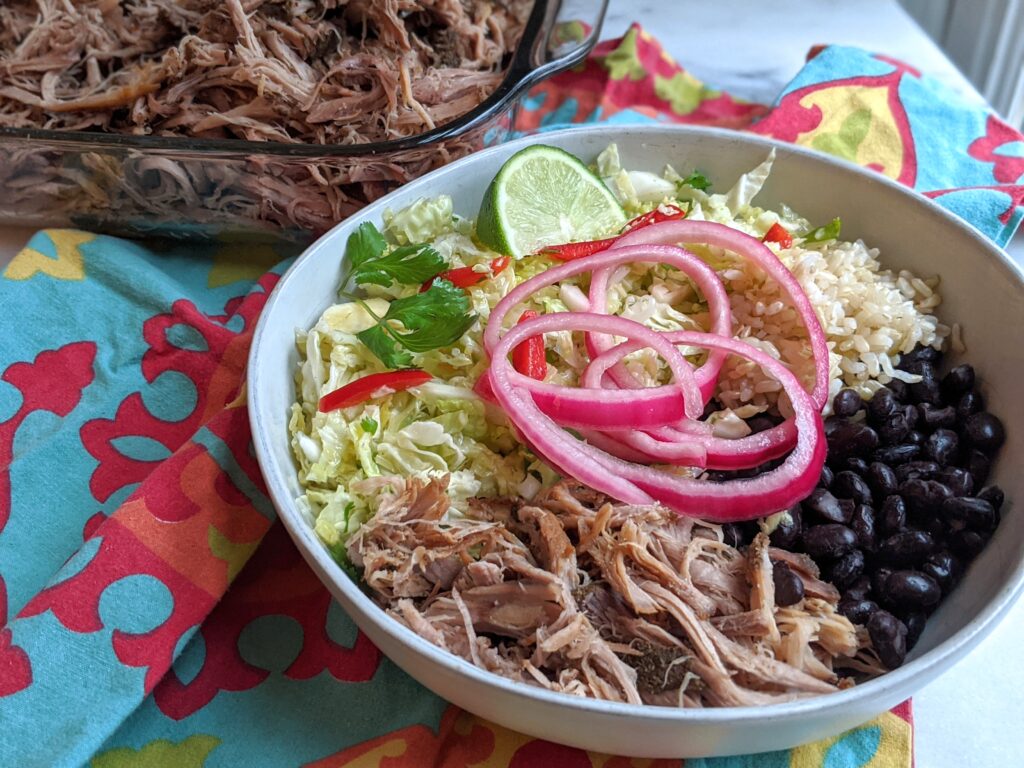
Here are a couple of ways to enjoy this sweet, tangy, and crunchy side dish:

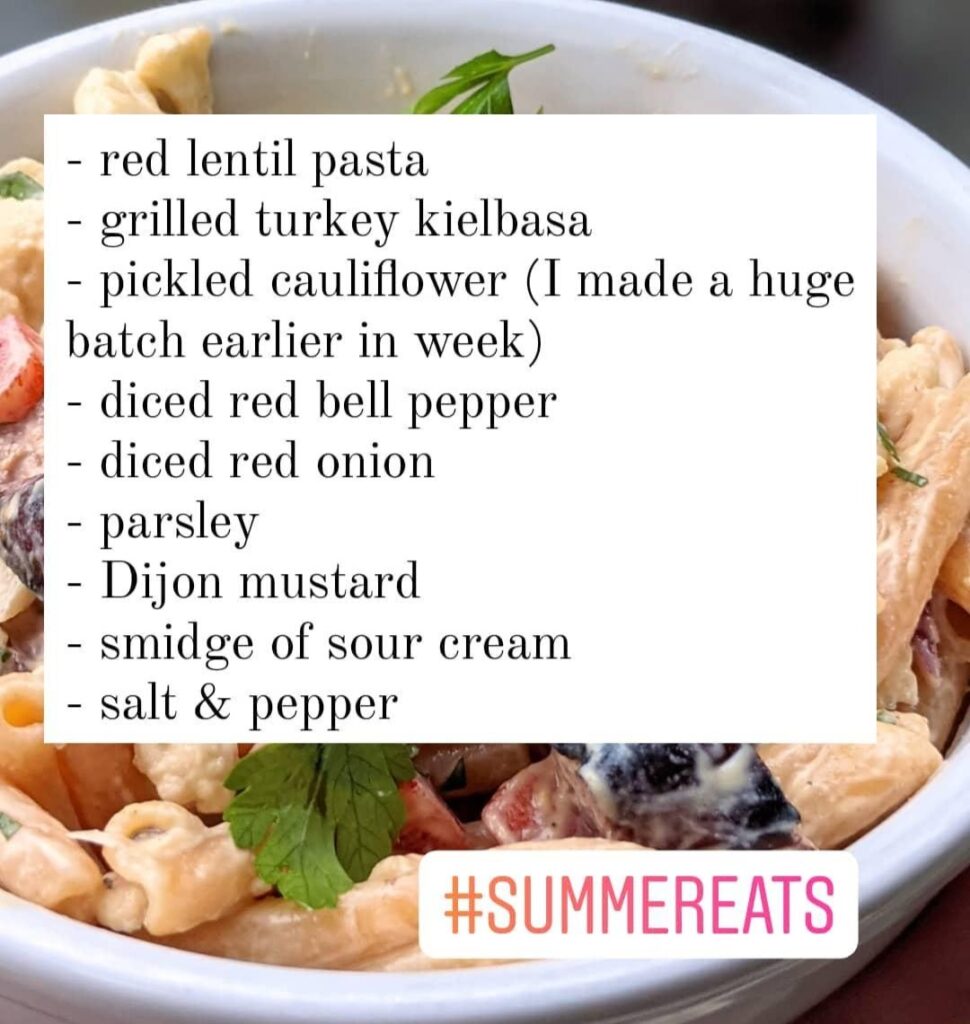
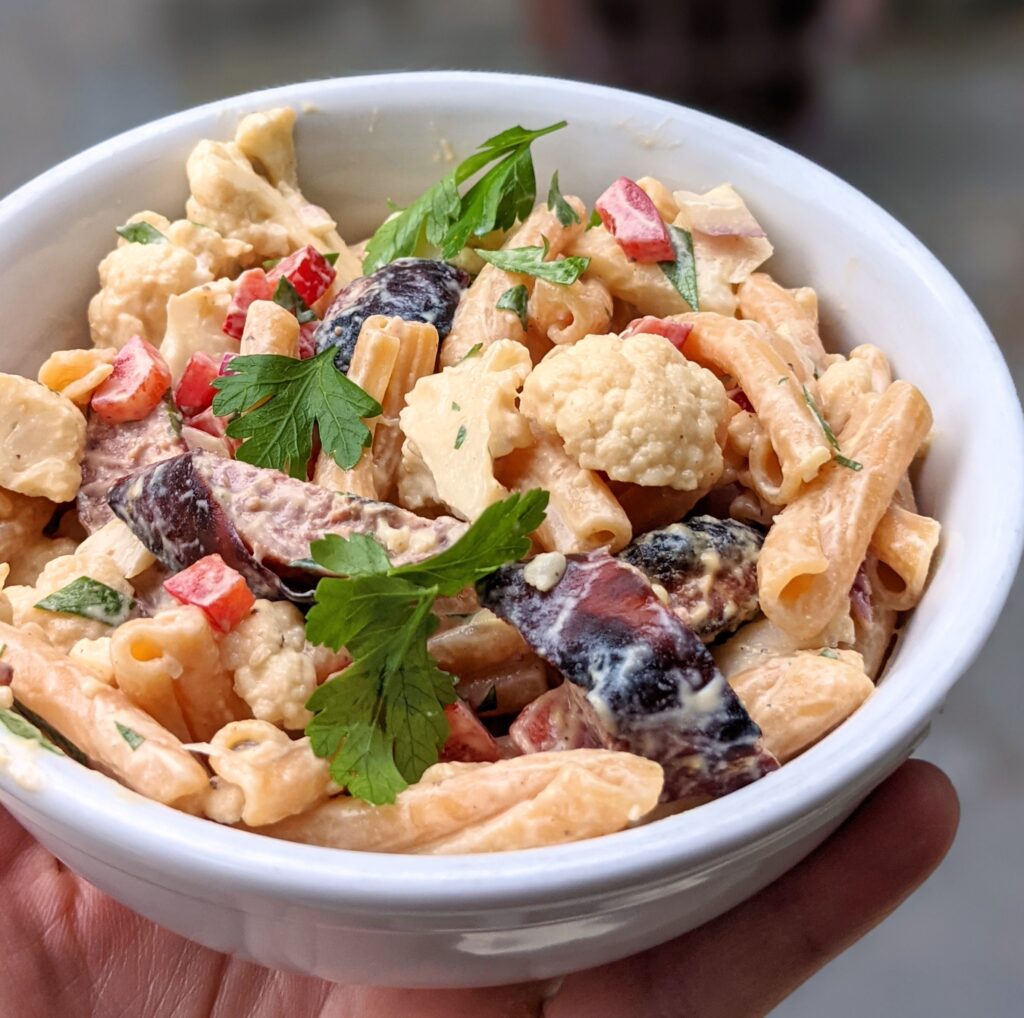
  • added to a pasta salad, like the one pictured below (an easy way to add plenty of tangy, acidic zip to your pasta salad AND boost the veggie content for a more balanced, fiber-rich pasta salad)
  • as a side to just about any meal – this one works with breakfast, lunch, or dinner!

make it your own

In my version of quick-pickled cauliflower, I’ve added flavor with the addition of mustard seeds and black peppercorns. Feel free to experiment with other spices if you like (ground or whole)! You could also add fresh herbs, dried herbs, garlic, or peeled and sliced fresh giner.

enoy it in a pasta salad

Easy, Veggie-Loaded Pasta and Grilled Turkey Kielbasa Salad (quick-pickled cauliflower included!)

Print Recipe
Quick-Pickled Cauliflower
Course Salads & Side Dishes
Servings
Ingredients
  • 1 small to medium head of cauliflower chopped into small, bite-sized pieces
  • 1 1/2 cups water
  • 1 1/2 cups cider vinegar
  • 4 tablespoons sugar (=1/4 cup)
  • 2 tablespoons kosher salt
  • 2 tablespoons mustard seeds
  • 1 teaspoon black peppercorns
Instructions
  1. Pack cauliflower in roomy jar* (I used a 1.5 liter Weck-brand jar). * NOTE: If you do not have an actual "canning" jar (which can tolerate hot liquids), use a large bowl or pot instead at this point. Later, after your mixture has cooled, you can pack it in any jar that fits.
  2. Combine vinegar, water, salt, sugar, and spices in pot and bring to simmer until salt and sugar dissolve.
  3. Pour immediately over cauliflower. Allow mixture to cool. Store in refrigerator. You can enjoy soon afterward, but the flavor really takes off and is more fully developed about 48 hours in. The pickled cauliflower will keep for a month in the fridge (though I am sure you will have eaten it all by then - too good to last!).

Filed Under: Featured, Recipes Tagged With: batch cooking, pickled, vegetables, veggies

Instant Pot Chicken Broth

By Jen

I’ve got nothing against using store-bought chicken broth, but sometimes it’s just too easy to make this homemade version instead (and cheaper than store-bought, too!). And nothing compares to the delicious and complex flavor of homemade broth. I will warn you . . . your taste buds will find it hard to go back to store-bought broth after they’ve experienced this homemade version. It’s a harsh truth, I know.

Fortunately, this broth is ridiculously easy to make, so you can give your taste buds the pleasure of this version without spending a lot of time and energy in the kitchen.

If you need a reliable roasted chicken recipe to actually have some leftover chicken bones to make this broth, check out my recipe for Simple Roasted Chicken Breasts.

An Asian-inspired chicken soup, loaded with garlic, ginger, and greens, and made with Instant Pot broth

Oooh, collagen!

Maybe you’re here because you’ve heard a lot of hype about “bone broth”, because it’s a source of collagen. Collagen is a protein, and is a main component of connective tissues throughout the body. It’s true that collagen does contain a wide variety of amino acids. And perhaps it’s a good nutritional strategy to consume a wider variety of those building-block amino acids than you would get from eating meat alone.

The bottom line, though on collagen? I’ll leave it at this: it’s complicated, and there’s a lot we don’t know for sure yet. I am a measured, evidence-based kind of gal, so I am not going to unjustifiably oversell you on the benefits of the collagen present in broth. Check out this helpful article if you want to determine for yourself if the current evidence lives up to the hype.

what you’ll need:

  • Your Instant Pot Yes, you can also make broth on the stovetop, but this version is all about the Instant Pot. I actually prefer to make broth in Instant Pot versus stovetop because 1) it doesn’t take as long, and 2) because the Instant Pot is so sealed up during the cooking process, the entire house doesn’t smell like broth. Sure, broth smells great, but I don’t like every corner, every bedroom of the house smelling like broth for hours and hours (as seems to happen when cooking broth on the stovetop). Maybe I am just hypersensitive to that, and it wouldn’t bother you at all. You do you.
  • Leftover chicken bones If you roast a chicken, or some bone-in chicken breasts or thighs, save the bones to make this broth. (You can even add chicken feet if you want. I haven’t gone there yet, but I’d love to learn from you if you have.) If you can’t get around to making the broth right away, feel free to toss the bones in the freezer until you’re good and ready to make the broth. Just thaw your bag ‘o bones in the fridge for at least a couple of hours before you start up your broth.
  • Aromatics In this case, onions, carrots, celery, and a little bit of garlic
  • Herbs and spices In this broth recipe, you’ll need black peppercorns (whole), parsley, dried bay leaf, and salt.
  • Cider vinegar The small amount of cider vinegar helps to extract the collagen from the bones during the cooking process. Cool fact, right? Fortunately, the amount used is so small that it doesn’t impart any kind of vinegar flavor to the broth. Whew.
  • Other tools needed Cutting board, chef’s knife, some sort of colander or mesh strainer to separate out the solids after cooking

Ways to enjoy this amazing broth you’ve made:

  • You can sip a hot mug of it on its own (seriously!).
  • Use it in any soup you would normally use chicken broth or stock. Might I suggest my Black Bean Soup recipe or my Creamy Butternut Squash Soup recipe?
  • Freeze it for later use.
Fill with water up to about two inches under the max fill line. Ready to cook!

Print Recipe
Instant Pot Chicken Broth
Course Soups & Stews
Cook Time 120 minutes
Servings
or so cups
Ingredients
  • chicken bones (leftover from about 2 1/2 - 3 1/2 lbs cooked chicken)
  • 1 onion, halved
  • 1-2 celery stalks, halved
  • 1 carrot, peeled and halved
  • 1 garlic clove peeled and gently pressed
  • 1 bay leaf
  • 1/2 teaspoon black peppercorns, whole
  • 1 teaspoon salt
  • 1 tablespoon cider vinegar
  • water enough to fill to 2" below max fill line
Instructions
  1. Add chicken bones to Instant Pot.
  2. Add remaning ingredients except for water.
  3. Add water up to two inches from max fill line.
  4. Cover. Set valve to "seal". Set to Manual/high pressure for 120 minutes.
  5. Allow for natural pressure release.
  6. Once broth has cooled, use a large slotted spoon to remove the bones and larger pieces of vegetables. Using a mesh strainer or colander, strain broth and store in container until use. Store in refrigerator or freezer.

Filed Under: Recipes Tagged With: broth, instant pot, soup

Quick Pickled Red Onions

By Jen

Quick-pickled red onions are an easy, delicious way to add a bright, tangy burst of flavor to a savory dish that needs that perfect finishing touch. It’s amazing how the small addition of something acidic can transform a meal!

Here are a few ways you can enjoy this simple side:

  • top your tacos or tostadas
  • add to pork carnitas (grab my easy carnitas recipe here)
  • top a bean salad (snag my recipe for easy, pantry-friendly bean salad here)
  • add to a grain salad or to a hearty kale salad
  • layer them in your sandwich
  • use as a topping for your avocado toast

bowl of pork carnitas with sides
perfect topping for a pork carnitas bowl

Store your pickled onions in a glass or ceramic jar. Plastic will absorb the flavors, and a metal container will likely react with the vinegar.

Print Recipe
Quick Pickled Red Onions
Course Salads & Side Dishes
Servings
Ingredients
  • 1 large red onion thinly sliced
  • 1/2 cup cider vinegar or white wine vinegar
  • 1 tablespoon sugar
  • 1 1/2 teaspoons kosher salt (Use a little less if using table salt.)
  • 1 cup water
Optional flavorings: (suggestions)
  • a few black peppercorns
  • 1 sprig thyme
  • coriander seeds
  • bay leaf
Instructions
  1. Combine vinegar, sugar, and salt in a small saucepan. Heat on low, stirring occasionally until salt and sugar dissolve.
  2. Add water. Let mixture cool.
  3. Add red onions to a jar or bowl (with lid) along with optional flavorings.
  4. Pour liquid into jar. Let sit at room temperature for one hour, then refrigerate. (As the onions pickle, they will release some of their water, and you will ultimately end up with a little bit more liquid in your container.)
  5. Onions will keep in fridge for two weeks.

Filed Under: Recipes

5-minute Hummus

By Jen

If someone had told me a few years ago that someday I’d routinely be making my own hummus, I would have laughed at the absurdity. Well, never say never. These days, I make it on a regular basis – maybe once every two or three weeks as part of meal prep.

I used to believe that making hummus would be difficult and time consuming, and I didn’t see any need to make my own when I could simply buy it at the store.  I was motivated to finally try making my own when I got tired of paying SO much for those tiny little tubs of hummus at the supermarket (have you seen the price lately??). Also, as I began to read nutrition labels a bit more closely, I realized that many hummus brands contain poor quality, inflammatory, highly refined oils.

When I make my own hummus, I’m not only saving a bit of money, I’m also able ensure that it doesn’t contain those icky inflammatory oils. And the best part? I was pleasantly surprised to learn that making hummus is ridiculously easy! Seriously, if you know how to turn on your food processor, you can make hummus.

Hummus is a great addition to a bowl meal.

Hummus is super versatile, which is a nice bonus when you’ve actually taken the time to make it yourself. We enjoy it as a dip with veggies for a snack, in a mediterranean bowl meal, added to a salad or wrap, or even thinned with red wine vinegar to make a creamy dressing. It’s also delicious spread it on roasted eggplant slices, for a hearty snack or a side to round out your meal. It’s a meal prep staple in our house.

Give it a try in your meal prep this week! I swear it will make your life easier as you pack lunches and throw together meals.?

An easy, well-rounded snack: hummus and veggies.

Great as a spread on roasted eggplant slices with greens.


Print Recipe


5-minute Hummus

Course Appetizers, Snacks
Cuisine Mediterranean

Servings


Ingredients
  • 2 14-15oz. cans chickpeas, drained and rinsed (or, if cooking your own chickpeas, 3 1/2 cups cooked chickpeas)
  • 2 cloves garlic
  • 2/3 cup tahini
  • juice of two lemons
  • 2 ounces water (Add more if hummus is too thick for your liking. Different batches of chickpeas have varying water content, which can slightly affect how much water you'll need.)
  • 1 tablespoon extra virgin olive oil
  • 1 teaspoon salt
  • dash of cumin


Instructions
  1. Add all ingredients except water to a food processor, and blend until almost completely smooth.

  2. Add water as processor is running, and blend until completely smooth.

Filed Under: Uncategorized Tagged With: easy, quick, vegan, vegetarian

Easy Steel-cut Oats, Instant Pot or Stovetop

By Jen

Oats are the ultimate meal prep staple, providing a hearty backdrop to everything from apple-pie oats to a savory version loaded up with eggs, avocado, bacon, and black beans. I prefer the steel-cut oats versus rolled oats or quick-cooking oats because steel-cut oats are a fantastic “slow carb”. A slow carb is a slower digesting carbohydrate, resulting in steadier blood sugar levels and insulin response. This is key to helping you feel steadily fueled and filled from one meal to the next. Also, keeping your metabolic hormones like insulin in check has a huge impact on your overall health. And that is why I get so excited about slow carbs!

These oats are super-easy to make, meaning that they take little effort, time, and clean up to prepare (the Holy Grail of meal prep, right?!). We make a big pot of these once or twice a week, and it definitely makes our breakfasts easier to throw together, and even are great in a pinch for a quick savory lunch or dinner.

Overnight oats, berry, and Greek yogurt parfait, paired with hard-boiled eggs makes a hearty, filling breakfast.

Add this one to your meal prep today! This breakfast-in-a-hurry is a favorite in our house. You can prep the oats and hard-boiled eggs at the beginning of the week, and then you’ve got breakfast for your household for several days. And, with no extra prep effort, everyone can have it their own way by changing up the toppings. The oats recipe is easy-peasy, and can be doubled, tripled, etc. if needed. Also, you can freeze any extra to use at another time.

Feel free to experiment with the liquid amounts a little bit to figure out your favorite texture/ level of chewiness.

Make-your-own oats bowl buffet

We start with plain, steel-cut overnight oats, and some hard-boiled eggs on the side for a protein boost. Topping choices for the oats include fruit, nut butters or nuts, plus a random selection of whatever we have stocked – chia seeds, shredded coconut, cacao powder, cacao nibs, homemade roasted nuts, hemp seeds, etc. Finishing touch options include honey, real maple syrup, and spices. When using frozen fruit (we love the frozen berries and cherries), a quick reheat in the microwave along with some of the prepped oats gets the job done. One other option is to thaw your frozen fruit in the fridge overnight.

Savory oats bowl: oats topped with avocado, egg, turkey bacon, wilted greens, black beans, tomatoes, chives, and a smidge of cheddar

oats with cottage cheese, blueberries, toasted walnuts, and cinnamon
delicous with cottage cheese, too
Print Recipe
Stupid Easy Steel-cut Oats
Course Breakfast
Servings
1/2 cup servings
Ingredients
Stovetop Version
  • 2 cups steel-cut oats
  • dash salt
  • 3 cups water
  • 4 cups plain, unsweetened milk of your choice (dairy, almond, etc.)
Instant Pot Version
  • 2 cups steel-cut oats
  • 3 1/2 cups water
  • 2 cups plain, unsweetened milk of your choice (dairy, almond, etc.)
  • dash salt
Instructions
Stovetop Directions:
  1. Combine all ingredients in a pot, uncovered, and bring to a gentle boil.
  2. As soon as it begins to boil, quickly remove from heat, cover, and set aside until morning.* Do not refrigerate until morning. * It is perfectly safe to soak the oats overnight without refrigeration. The soaking process enhances digestibility of the oats.
Instant Pot Directions:
  1. Combine oats, water, milk, and salt into Instant Pot.
  2. Place lid on securely, and set valve to "sealing"
  3. Set to manual/ high-pressure for 5 minutes.
  4. Allow for natural pressure release.

Filed Under: Recipes Tagged With: batch cooking, instant pot, oats, quick

Curry Coconut Roasted Cashews

By Jen

If you get a little too excited about all things sweet & salty (yup, me too), this is THE snack for you. Sure, you can buy roasted nuts at the store, but they won’t taste anywhere near as good as these. And store-bought nuts have likely been roasted in less-than-stellar quality oil (go check that ingredient list on those nuts in your pantry now!). Plus, these are so easy to make, and involve no clean up, really, if you line your baking sheet with parchment paper.

As far as snacks go, you can’t go wrong with nuts. They’re loaded with satiating, nourishing good fats, and a bit of protein and carbs, too. When roasted, spiced, and salted, they satisfy that snack-time hankering for something crunchy and flavorful. And that curry powder can help fight inflammation and aid digestion.


Print Recipe


Curry Coconut Roasted Cashews

Course Snacks

Servings


Ingredients
  • 1 1/2 cups raw cashew pieces I get mine at Trader Joe's
  • 1 tbsp of curry @frontiercoop is my absolute favorite.
  • 1 teaspoon coconut oil (again Trader Joe’s FTW)
  • 1 tablespoon water
  • 1 tablespoon honey
  • 1/2 teaspoon salt
  • . Preheat oven to 250F. Line a large rimmed baking sheet with parchment paper.


Instructions
  1. Melt the coconut oil in a small bowl, and then whisk in the remaining ingredients except for the cashews.

  2. Dump the cashews onto the baking sheet. Pour your spice/oil mixture over the cashews, and gently mix together with a spatula, ensuring that the nuts are completely coated. Spread out evenly on baking sheet.

  3. Bake at 250F for approximately 40 minutes, or until the cashews look toasted, and appear mostly dry.

Filed Under: Recipes Tagged With: cashews, coconut, nuts

Primary Sidebar

About Me:

Hi, I’m Jen, and welcome to Nourished Not Famished. Here you’ll find recipes, meal ideas, and wellness tips to thrive without deprivation or restriction. I like to keep healthy changes simple, and grounded in a real-life approach (the secret to making it stick!).  Find out about more about me here, and how you can work with me!

Get updates via email

* indicates required
Website sign up

Searching for something in particular?


Instagram

🍋 Greek-inspired Shrimp Bowls! Ready for someth 🍋 Greek-inspired Shrimp Bowls! Ready for something fresh, citrus-y, crisp, and cool? 🌞 Lemon, feta, and dill bring a bright, herb-y tang to this nourishing and tasty lunch (or dinner). Hit save to make this one soon!

When life gets busy, it's easy to let meals go by the wayside. Keep your energy levels up and your mental focus dialed in by packing your plate with foods that *satisfy* and boost your energy: 
protein, healthy fats, veggies (and/or fruits) and slow-acting starchy carbs. 

Quick and easy gets the job done! This lunch (or dinner) is mostly a no-cook meal, except for the starchy side (which came from my meal prep - see deets below). .
#whatsonmyplate (each serving)
➡️ thawed pre-cooked shrimp
➡️ about a half cup chickpeas
➡️ cucumbers and cherry tomatoes
➡️ about 2 tbsps feta
➡️ 1 tbsp EVOO
➡️ about 2 tbsp chopped fresh dill
➡️ fresh lemon juice, salt & pepper, and a dash of za'atar spice
➡️ about a half cup (already cooked) quinoa (hiding underneath)
.
.
#fastfood #balancedplate #powerplate #poweryourplate #poweryourlife #simplenutrition #nourished #lunch #whatsfordinner #nourishednotfamished #ditchthediet #protein #fat #carbs #slowcarbs #recipe #mealprep #honoryourhunger #batchcooking 
.
.
.
.
.
So, you're feeling motivated to make some healthy So, you're feeling motivated to make some healthy changes. Yay, You! 🎉👏👏👏 The secret to making it all happen is . . . there is no secret. The unsexy truth is real change happens (and sticks!) through long-term consistency with the basics.

Nope, the Six-Week Shred plan isn't the magic bullet some huckster is trying to tell you it is. 

It's all about practicing the basics, with a focus on *making them happen in a way that works for you today, this week, this month*. 

And knowing that "what works right now" will change over time.

That's where the Practice Mindset helps! 👇
1️⃣ Practice a small change for a set period of time.
2️⃣ Next, pause and reflect: How did it go? What worked, what didn't, and why?
3️⃣ Proceed if it's working, or Pivot if needed (tweak the change to better fit your life).

Those unsexy basics to practice?
👉Eat more whole (or minimally refined) foods,.and less of the highly refined stuff. (Notice that I didn't say "none"?)
👉Balance your plate at meals with protein, healthy fats, and carbs. Keep it colorful, with plenty of plants in the mix.
👉 Sleep, rest, recover.
👉 Do what you can to manage stress.
👉 Move your body daily (walking is great!). Build your strength. #makesomemuscle
👉 Spend some time doing fun things that help you connect with yourself. #selfcare
👉 Get outdoors. Natural light, Vitamin D, fresh air, and nature are key. (You are a living thing, remember? 😉)
👉 Connect with people and experiences that nourish you.

Hit up my blog (link in bio @nourished.not.famished ) for ideas, tips, and resources to help you get cracking on practicing those unsexy basics. 😘

Which of these basics is your practice priority right now? How's it going?
.
.
#makeitstick #tinyhabits #healthyhabits #practicenotperfection #nourishednotfamished #skillpower NOT #willpower
#changeskills #eatingskills #kitchenskills #balancedplate #simplenutrition #movement #sleep #stressrelief #ditchthediet  #resistancetraining #strength #metabolichealth #fitover40 #fitover50
.
.
.
.
Reminder📣. . . these un-sexy, SIMPLE basics ge Reminder📣. . .  these un-sexy, SIMPLE basics get the job done! Not just during the holidays, but *all year long*. And simple is just what you need right now, isn't it?

Why do they work? 
👉 Because all of these habits focus on *giving yourself what you need to thrive*. 🌱 

I invite you to try this:
👉Spend a few months TRULY practicing these simple habits most of the time. Start with just one, or a few (✨Start small, and add as you feel ready.✨)
👉TIP: Sleep is a great one to start with, because it's the foundation that holds up everything else. 

As you practice these habits, pause and observe:
🤔How do I feel? 
🤔How am I performing, physically and mentally? 
🤔How is my energy?
🤔How do my clothes fit?
🤔How have my longer-term health indicators like blood pressure, cholesterol levels, and blood glucose levels changed?

If you truly desire healthy changes that
✔️feel sustainable
✔️ yield results
✔️ and STICK,
stop relying on willpower!

🌟Focus your efforts on *meeting your needs*, rather than restricting and depriving.🌟
.
Stay in a groove with these habits this month, and you might just discover come January 1st that you feel ready to tackle the new year, no over-the-top diet and intense workout plans necessary! 

👉By then, you'll have already established the habits you need that let your biology work for you for optimal wellness, instead of relying so heavily on willpower.👈

Who's with me?! Will you be KISS-ing your way through the holiday season?? 

#mistletoe #healthyhabits #nourishednotfamished #tinyhabits #atomichabits #wellness #healthy #balancedplate #sleep #stressrelief #circadianrhythm #movement #everythingisconnected #holidays #december #protein #veggies #christmas #nourished #honoryourhunger #ditchthediet #fitover40 #fitover50
The most delicious form of self care: meal prep. 💕 (See stories for deets on this Turmeric Pepper Chicken & Asparagus!) 

During this busy holiday season, your needs often end up on the back burner. 
Which can leave you feeling hangry, exhausted, and ravenous by the end of the day. 
(You know, that feeling when you walk in the door and dive head-first into the bag of chips? #beentheredonethat 🤷‍♀️)

Packing up a few nourishing lunches is a surefire way to boost your midday energy during the week, and leaves you feeling *satisfied* at lunchtime. 

👉 You don't have to make fancy, fussy recipes.
👉 Instead, keep it simple & balanced by packing a lunch container of some protein, fat, carbs, and veggies and/or fruit. Leftover dinner is a great shortcut! 
👉 If takeout is part of your lunch plan, be strategic about ordering meals that will actually nourish you (yup, that means protein, fat, carbs, and veggies and/or fruit).

Is lunch a pain point for you, too?

Would you love the convenience of having it all ready ahead of time?

✨For lunch ideas 
and my top picks for leakproof lunch containers, 
check out my website at link in my bio @nourished.not.famished ✨

Head to "My Favorite Things" section of my site for my top container picks! 

#lunch #whatsforlunch #realfoodfastfood #mealprep #balancedplate #simplenutrition #ditchthediet #tinyhabits
#healthyhabits #poweryourlife #eatingskills #kitchenskills #plantforward #omnivore #fitover40 #fitover50 
.
.
.
.

Copyright © 2023 · Nourished Not Famished