• Skip to primary navigation
  • Skip to main content
  • Skip to primary sidebar

Nourished not Famished

Real-life healthy changes, made simple and delicious.

  • Home
  • Recipes
    • Main Dishes
    • One Pan Dinners
    • Breakfast
    • Salads & Side Dishes
    • Soups & Stews
    • Snacks
    • Sauce/Dressing/Spices
    • Appetizers
    • Desserts
  • Real Food, Real Health
    • Why Real Food works
    • Getting Started
    • Meal Prep/Meal Planning Tips
    • The Other 3: Sleep, Stress Relief, & Movement
  • About
  • Contact
  • My Favorite Things
  • Nav Social Menu

    • Facebook
    • Instagram
    • YouTube

avocado oil

Decadent Five Layer Dip That’s Healthy Enough For Dinner

By Jen

the dip that’s a dinner, too
click here to jump to recipe

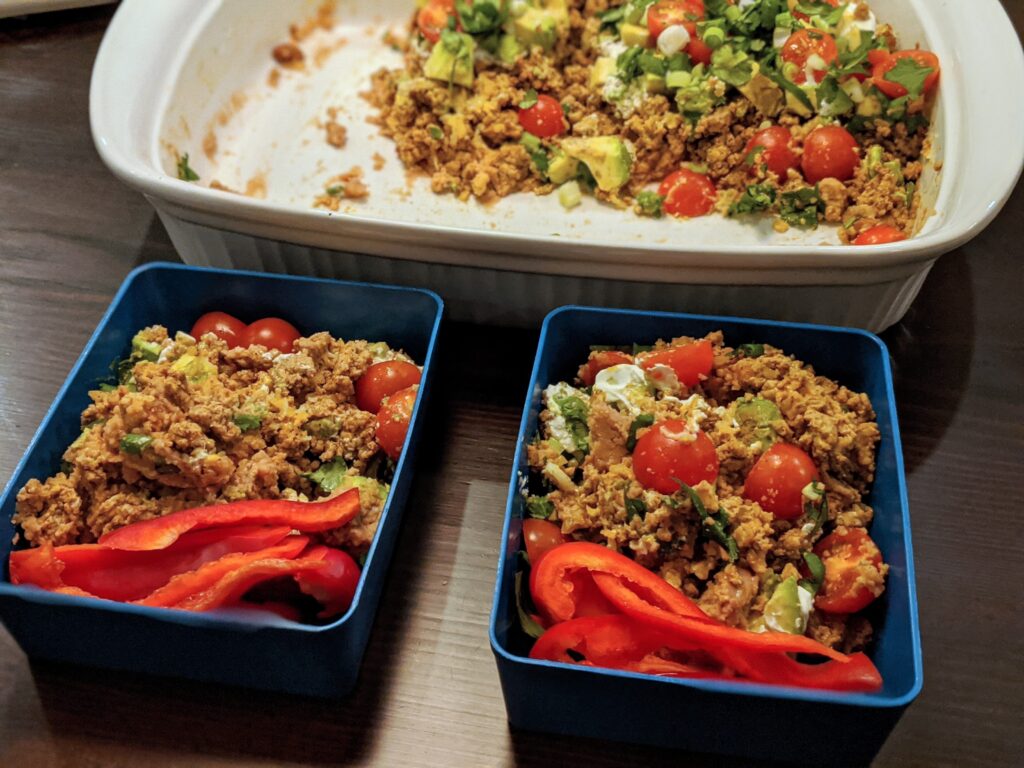
Yup, you can have your dip and your health, too. It’s easy to dismiss dip as party food only, to be enjoyed without the goal of actually eating healthy. Well, this dip recipe (that’s honestly more of a meal than a dip) is your game changer. It’s easy to assemble, is chock full of vegetables, protein, and slow carbs, AND includes all of those 5-Layer-Dip essentials: avocado, cheese, and a bit of sour cream. Yes, your favorite game-day appetizer can be your Tuesday night dinner! And let’s not forget that you can always dump any leftovers into a container and pack it for lunch tomorrow.

And, no, I didn’t resort to anything gross like lowfat cheese and fake meat in a misguided attempt to make this healthy. Uh uh. No way. I would never do that to you guys. You deserve better. Instead, I made a few tweaks that shifted this into “healthy enough for everyday”, while still giving you the full fiesta experience that a proper five layer dip should provide.

  • The bottom layer is your basic refried beans. Refried beans are essential to a five layer dip, and are a great source of slow-acting, satiating carbohydrate (that also happens to include a bit of protein, too). Beans are considered the world’s #1 longevity food, so there’s that, too. Wowsers, right? To keep things easy, I use canned refried beans. I used fat-free because the other types of refried beans (labeled “traditional”, etc.) are often made with low quality fats that are more harmful than healthful. This is where the avocado layer comes in . . .
  • The dip is topped with a generous layer of avocado, which is an excellent source of heart-healthy, anti-inflammatory monounsaturated fat. But wait, there’s more: avocado also is a rich source of potassium, fiber, vitamin K, folate, vitamin C, and more.
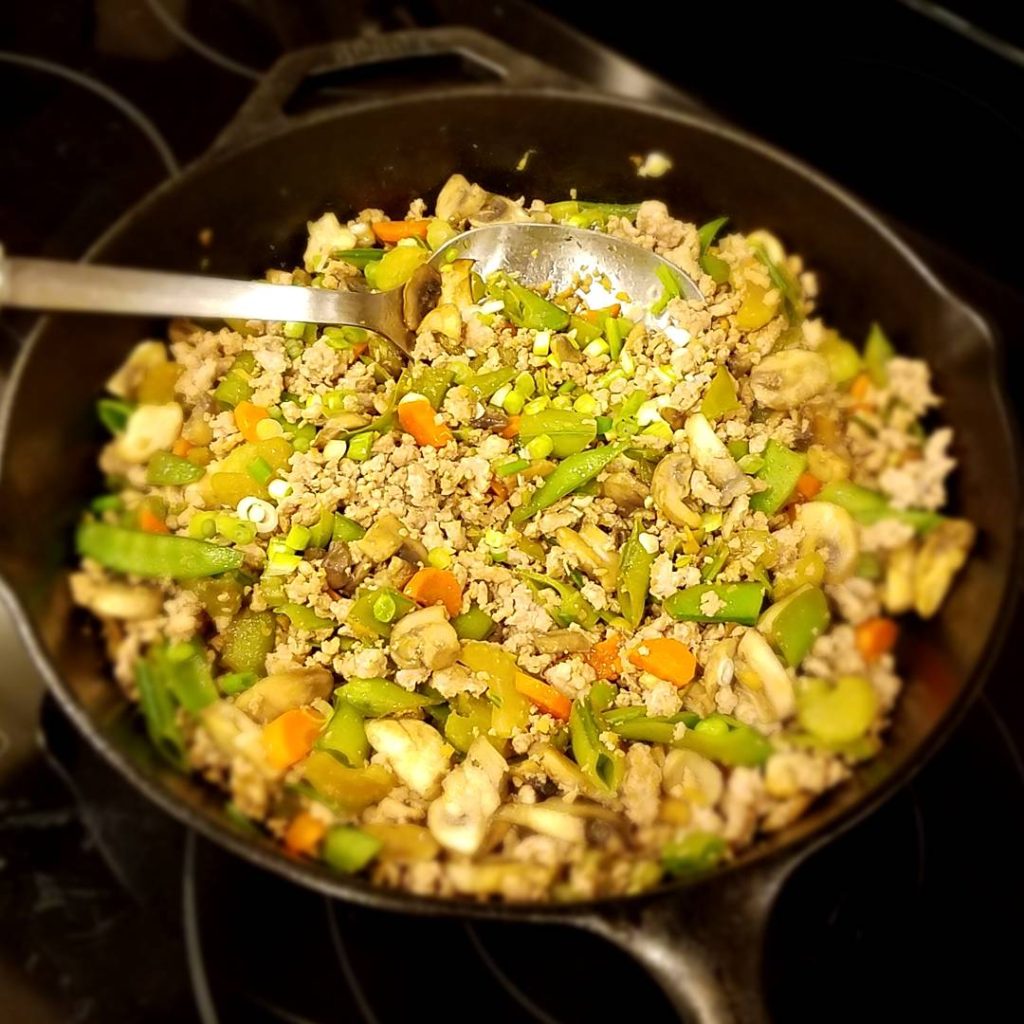
  • I added a cup of cauliflower rice (store-bought, straight from the freezer) to the ground turkey. This does not change the texture and taste of the meat layer of this dip. It does, however, painlessly add yet another serving of vegetables to your day. Winning!
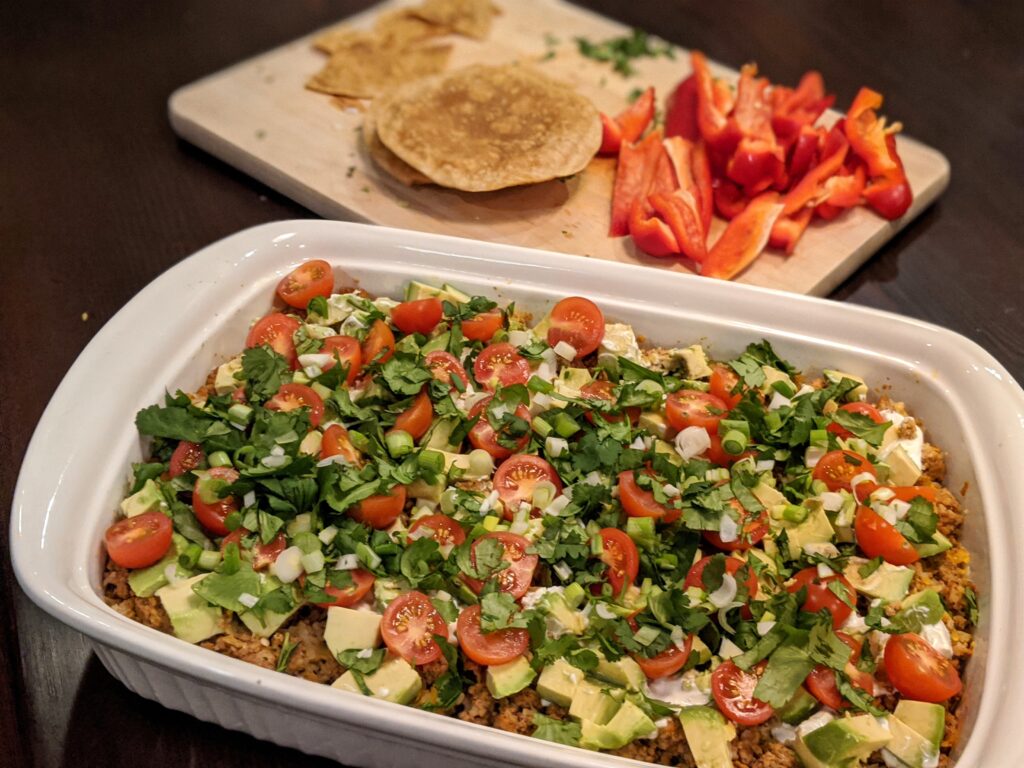
  • Instead of chips, I’ve included some healthier options for scooping up. A few options are red pepper strips, homemade corn tortilla chips (which results in chips made with a healthier fat such as avocado oil), or even Ezekiel sprouted grain tortillas you can oven bake for a sturdy chip. Of course, if you (or your loved ones) have a “from my cold dead hands” relationship with classic store-bought tortilla chips, I’m not going to get in your way. This is a no judgment zone.
  • I included some cheese and sour cream in this dip, because, hey, did you even five layer dip if it didn’t include those? I aimed to include enough to satisfy without going overboard. In case you were wondering, yes, a bit of dairy now and then is fine for you, provided you aren’t lactose intolerant. Ideally, opt for grass-fed sources of dairy if possible (but don’t sweat it if that’s not an option). Of course, if you’re lactose intolerant, feel free to subtitute with your favorite dairy-free stand-ins.

I am a big fan of any shortcut that makes a real-food lifestyle easier. Feel free to use store-bought taco seasoning when you make this, but please check the ingredient label for any funny business. You don’t need weird fillers and mystery ingredients in your food. Or you can use what you probably already have in your spice rack, and make my recipe for Taco Seasoning. Keep things easy by passing off the spice recipe to someone else in your household. Hey, if you’re making this incredible five layer dip for them, it’s the least they can do.

If dips are an essential part of your eating life, check out my recipes for 5-Minute Hummus and also Buffalo Chicken Hummus Dip.

leftovers all packed up for tomorrow’s lunch

Print Recipe
Decadent Five Layer Dip that's Healthy Enough for Dinner
Have your dip and your health, too with this satisfying and nourishing Mexican Five Layer dip. Perfect for an easy weeknight dinner, an appetizer, or for a snack.
Course Appetizers, Main Dishes
Cuisine Mexican
Servings
generous entree portions (serves more if used as an appetizer)
Ingredients
Dip ingredients
  • 1 lb. ground turkey
  • 2 16 ounce cans refried beans, fat-free (see notes above why to go fat-free here)
  • 2 teaspoons avocado oil
  • 1 pint cherry tomatoes, halved
  • 1 medium avocado, diced
  • 1 cup frozen riced cauliflower (a.k.a. cauliflower rice)
  • 1 packet taco seasoning (no junky ingredients; or use my recipe "Taco Seasoning")
  • 1/4 cup shredded cheddar or Mexican blend cheese
  • 1/4 cup sour cream
  • 1 bunch scallions, chopped
  • 1/2 bunch cilantro, chopped
Dipping options (Pick and choose. You do you.)
  • 3 red bell peppers, cut into wide strips
  • 4 corn tortillas brushed with avocado oil, sprinkled with salt and oven baked to crispy; cut into chip size pieces after baking; optional
  • 2 large Ezekiel sprouted grain tortillas oven baked to crispy (a pizza stone works great for this!) break into chip size pieces after baking; optional
  • 1 1/3 cups cooked brown rice (measured after cooking); optional
Instructions
  1. Preheat oven to 350F.
  2. Heat the avocado oil over medium heat in a medium skillet. Add ground turkey. Stir frequently until browned, continuously breaking up the meat into the smallest possible pieces. You might need to turn up the heat beyond medium for part of the cooking process.
  3. Add the taco seasoning to the meat, and stir to combine.
  4. Add the frozen riced cauliflower, and stir to combine. Heat the turkey mixture for about 2-3 more minutes. Set aside.
  5. Spread the refried beans into a 9x13 baking dish, smoothing out evenly with a spatula.
  6. Top the bean layer with the turkey mixture. Spread out the turkey mixture so that it's even distrubuted.
  7. Scatter the shredded cheese over the turkey layer.
  8. Bake in preheated oven for approximately five minutes, long enough to melt the cheese.
  9. Allow baked mixture to cool for a few minutes.
  10. Top with diced avocado, scallions, sour cream, and cilantro.
  11. Serve with your choice of sides (see dipping options above).

Filed Under: Recipes Tagged With: easy, party food, quick and easy

Creamy Butternut Squash Soup

By Jen

chili roasted butternut squash soup

Squash soup = the quintessential fall and winter soup

click here to jump to recipe

Though pumpkin takes centerstage throughout fall and winter, butternut squash really deserves some time in the spotlight, too. My husband is an avid gardener, and this recipe was inspired by some butternut squash I harvested from our front-yard garden. The fall’s gentle, temperatures here in coastal New England extend the growing season a tiny bit, so we’ll be enjoying a generous pile of squash this winter!

For this soup, I paired the squash with the warm, savory flavors of chili and cumin to balance the squash’s natural sweetness. The final swirl of coconut milk (or cream) gives it a velvety texture.

I am a fan of any recipe that helps me save time in the kitchen. This recipe can be a serious boost to your weekly meal prep if you double it. It freezes well, so it’s wonderful to stash it away for a busy night when you can just defrost it, heat it, and add it to a meal with a lovely protein and huge pile of veggies on the side for an easy, nourishing balanced meal. 

Time-saving tips!

  • Use the peeled, pre-cut squash available at most supermarkets. 
  • Use a handheld immersion blender for the pureeing/blending step. This one is a great option. 


Yes, there is a safe way to cut butternut squash.

If the thought of cutting hard butternut squash strikes fear in your heart, no worries! It can be done safely (and easily!), without losing a finger.

You see, I love a good deal when I see one, and I hate spending extra $ on pre-cut squash if it’s no big deal to do it on my own. It’s definitely cheaper to buy it whole, and in purchasing it whole, you get the benefit of extended shelf life compared to pre-cut squash.

Well, here’s the super easy, safe way around that. Instead of attempting to cut a rock-hard raw squash, try this sneaky tip:

instructions on cutting squash safely

This soup is full of comforting, nourishing flavors and textures. It’s warmly spiced without being too spicy, and comes together in just a few steps. And I just couldn’t resist throwing in a few pomegranate arils as a garnish. The tart sweetness totally complements the savory squash flavors. Cranberries or craisins would be a great garnish, too.


And if you’re in a soup kind of mood, also check out my super-easy recipe for Black Bean Soup.

helpful tools to make this recipe

  • chef’s knife
  • cutting board
  • soup pot in a size that works for your needs (Like this super giant one, or this 6-quart one)
  • immersion blender for quick pureeing
  • ladle
Print Recipe
Creamy Butternut Squash Soup
Course Soups & Stews
Servings
Ingredients
  • 2 20 ounce packages peeled, cubed/chunk butternut squash (40 oz. total) (OR if using whole butternut squash, about 3lbs squash, peeled, de-seeded, and chopped); frozen works, too)
  • 4 cups chicken broth
  • 2 teaspoons avocado oil (or other neutral oil)
  • 1 large shallot diced (or substitute with similar amount chopped onion)
  • 1 garlic clove minced or pressed
  • 1 tablespoon chili powder
  • 1/2 teaspoon ground cumin
  • 1 1/2 teaspoons salt (fine kosher salt)
  • 1/2 cup full fat coconut milk (canned kind) OR heavy cream
  • pomegranate arils or cranberries (or craisins) for garnish optional
Instructions
  1. In a medium pot, heat oil on medium low heat. Add garlic and shallot, and cook until softened. Be careful not to brown the garlic (reduce heat if necessary).
  2. Add cumin, chili powder, and salt, and stir for one minute (until fragrant).
  3. Add cubed squash and approximately 4 cups of broth to pot.
  4. Bring to a boil, then lower the heat and simmer, covered, until the squash is tender, about 20 minutes.low for 5 minutes.
  5. Add coconut milk. Using an immersion blender, blend soup until smooth.* If too thick, add more broth as necessary.
  6. Garnish with pomegranate seeds or cranberries if desired.
Recipe Notes

*If you don't have an immersion blender, you can puree the soup in batches in your regular blender. IMPORTANT: Check your blender's directions on how to safely blend hot foods.

Filed Under: Recipes Tagged With: comfort food, dairy-free, fall, squash

Maple Mustard Rosemary Grilled Turkey Tenderloin

By Jen

grilled turkey tenderloin

When warm spring and summer temps hit, we want to be outside, chilling out,  and not spending hours in the kitchen, right? Grilling is a great way to keep things simple. No pans to clean, and you can churn out a delicious meal *fast*, and with little effort.

Don’t sweat it when it comes to grilling prep. Keep it simple! I made this mustard, maple, and rosemary grilled turkey tenderloin just flying by the seat of my pants – no real measuring, no fuss. Turkey tenderloins are very flavorful and tender, and perfect for when you feel like you just can’t take another chicken dinner.

picture of kale and blueberry salad with grilled turkeky tenderloin

Grilled maple mustard rosemary turkey tenderloin is a delicious protein addition to a summer salad!

And, FYI, marinating the meat has benefits beyond flavor and tenderness. When meats are grilled, the cooking process generates carcinogenic compounds known as HCAs (heterocyclic amines). Carcino-whut?? Hold on, there  – no need to freak out and toss out your grill!  It turns out that the antioxidant-rich herbs and spices (such as rosemary, thyme, oregano, sage, cumin, coriander seed, and turmeric) that are often found in marinades greatly decrease or *eliminate* these HCAs that are formed when you grill meats. So, sure, it’s totally fine to occasionally enjoy grilled foods. Just remember that marinating those foods has a strongly protective effect by preventing the formation of HCAs. As a matter of fact, rosemary is the superstar when it comes to reducing HCAs, so maybe you wanna give this recipe a try?


The marinade basics:

the basics you’ll need to make this marinade


The basic how-to:


the quick and dirty on how this easy recipe comes together (see details below)


Print Recipe
Maple Mustard Rosemary Grilled Turkey Tenderloin
grilled turkey tenderloin
Course Main Dishes
Servings
Ingredients
  • 2 turkey breast tenderloins (a two-tenderloin package is typically 1.5-1.75lbs)
  • 2 tablespoons avocado oil
  • 2 tablespoons dijon mustard
  • 2 teaspoons real maple syrup
  • 1 tablespoon of chopped fresh rosemary
  • a splash of soy sauce (tamari or coconut aminos works too if you need to keep things soy free)
grilled turkey tenderloin
Instructions
  1. Combine oil, rosemary, maple syrup, mustard, and soy sauce. Pour over tenderloins and spread to coat evenly.
  2. Marinate tenderloins in refrigerator for at least two hours, if possible. If you don't have time to marinate that long, aim for 15-30 minutes if you can. It's still gonna taste great.
  3. Cook on the grill at medium heat, approximately 8 - 10 minutes per side. Be sure to cook until internal temp hits 165 degrees farenheit.
  4. Let the cooked turkey rest for a few minutes before slicing (and maybe you could take a few minutes of well-deserved rest, too?). This allows the juices to redistribute throughout the turkey so that it can retain the juices rather than flow out onto your cutting board. I know you're really hungry and want to eat right now, but you don't want dry turkey, do you?

Filed Under: Recipes Tagged With: grill, herbs, maple, mustard, summer, turkey

One-Pan Garlic & Ginger Ground Pork Stir Fry

By Jen

As the week drags on, let’s admit it – getting dinner on the table becomes even *more* of a pain. Yes, the eating part is fun, but oh, lordy, the prepping sure ain’t no fun when you’re too tired for anything but fuzzy slippers and binge watching your Netflix faves. And you so badly want it to hurry up and be Friday already. That’s when I rely on fast dinners like this One Pan Garlic & Ginger Ground Pork Stir Fry to get me through.


Print Recipe


One-Pan Garlic & Ginger Ground Pork Stir Fry

Course Main Dishes, One Pan Dinners
Cuisine Asian

Servings


Ingredients
  • 1 - 14 oz bag coleslaw mix/ shredded cabbage   NO dressing
  • 1 pound ground pork
  • 3 cups broccoli florets chopped finely (or shred in food processor)
  • 3 cloves garlic minced or pressed
  • 1" chunk ginger minced, more if you like
  • 3 tbsp soy sauce or tamari or coconut aminos if you prefer
  • 1 tsp avocado oil or high oleic safflower oil
  • 1/2 teaspoon toasted sesame oil
  • 1 cup black beans cooked
  • 2 cups cooked brown rice


Instructions
  1. Heat a large skillet over medium-high heat, and add ½ tsp avocado oil.

  2. Add pork to skillet, and cook until browned.

  3. Remove pork from pan, and place to the side in a bowl.

  4. Reduce heat to medium, add remaining 1/2 tsp of oil, and add garlic and ginger. Stir, and cook for 1 minute, until fragrant. Do not let garlic brown (reduce heat if necessary).

  5. Add remaining vegetables, and cook at medium to medium-high heat until softened a bit, but not mushy.

  6. Reduce heat to low, add cooked pork to pan and 1 cup of black beans. Stir gently.

  7. Remove pan from heat, drizzle with soy sauce and sesame oil, and then stir to combine. Serve over rice and enjoy!

Filed Under: Recipes Tagged With: cabbage, one pan, pork, rice

Primary Sidebar

About Me:

Hi, I’m Jen, and welcome to Nourished Not Famished. Here you’ll find recipes, meal ideas, and wellness tips to thrive without deprivation or restriction. I like to keep healthy changes simple, and grounded in a real-life approach (the secret to making it stick!).  Find out about more about me here, and how you can work with me!

Get updates via email

* indicates required
Website sign up

Searching for something in particular?


Instagram

🍋 Greek-inspired Shrimp Bowls! Ready for someth 🍋 Greek-inspired Shrimp Bowls! Ready for something fresh, citrus-y, crisp, and cool? 🌞 Lemon, feta, and dill bring a bright, herb-y tang to this nourishing and tasty lunch (or dinner). Hit save to make this one soon!

When life gets busy, it's easy to let meals go by the wayside. Keep your energy levels up and your mental focus dialed in by packing your plate with foods that *satisfy* and boost your energy: 
protein, healthy fats, veggies (and/or fruits) and slow-acting starchy carbs. 

Quick and easy gets the job done! This lunch (or dinner) is mostly a no-cook meal, except for the starchy side (which came from my meal prep - see deets below). .
#whatsonmyplate (each serving)
➡️ thawed pre-cooked shrimp
➡️ about a half cup chickpeas
➡️ cucumbers and cherry tomatoes
➡️ about 2 tbsps feta
➡️ 1 tbsp EVOO
➡️ about 2 tbsp chopped fresh dill
➡️ fresh lemon juice, salt & pepper, and a dash of za'atar spice
➡️ about a half cup (already cooked) quinoa (hiding underneath)
.
.
#fastfood #balancedplate #powerplate #poweryourplate #poweryourlife #simplenutrition #nourished #lunch #whatsfordinner #nourishednotfamished #ditchthediet #protein #fat #carbs #slowcarbs #recipe #mealprep #honoryourhunger #batchcooking 
.
.
.
.
.
So, you're feeling motivated to make some healthy So, you're feeling motivated to make some healthy changes. Yay, You! 🎉👏👏👏 The secret to making it all happen is . . . there is no secret. The unsexy truth is real change happens (and sticks!) through long-term consistency with the basics.

Nope, the Six-Week Shred plan isn't the magic bullet some huckster is trying to tell you it is. 

It's all about practicing the basics, with a focus on *making them happen in a way that works for you today, this week, this month*. 

And knowing that "what works right now" will change over time.

That's where the Practice Mindset helps! 👇
1️⃣ Practice a small change for a set period of time.
2️⃣ Next, pause and reflect: How did it go? What worked, what didn't, and why?
3️⃣ Proceed if it's working, or Pivot if needed (tweak the change to better fit your life).

Those unsexy basics to practice?
👉Eat more whole (or minimally refined) foods,.and less of the highly refined stuff. (Notice that I didn't say "none"?)
👉Balance your plate at meals with protein, healthy fats, and carbs. Keep it colorful, with plenty of plants in the mix.
👉 Sleep, rest, recover.
👉 Do what you can to manage stress.
👉 Move your body daily (walking is great!). Build your strength. #makesomemuscle
👉 Spend some time doing fun things that help you connect with yourself. #selfcare
👉 Get outdoors. Natural light, Vitamin D, fresh air, and nature are key. (You are a living thing, remember? 😉)
👉 Connect with people and experiences that nourish you.

Hit up my blog (link in bio @nourished.not.famished ) for ideas, tips, and resources to help you get cracking on practicing those unsexy basics. 😘

Which of these basics is your practice priority right now? How's it going?
.
.
#makeitstick #tinyhabits #healthyhabits #practicenotperfection #nourishednotfamished #skillpower NOT #willpower
#changeskills #eatingskills #kitchenskills #balancedplate #simplenutrition #movement #sleep #stressrelief #ditchthediet  #resistancetraining #strength #metabolichealth #fitover40 #fitover50
.
.
.
.
Reminder📣. . . these un-sexy, SIMPLE basics ge Reminder📣. . .  these un-sexy, SIMPLE basics get the job done! Not just during the holidays, but *all year long*. And simple is just what you need right now, isn't it?

Why do they work? 
👉 Because all of these habits focus on *giving yourself what you need to thrive*. 🌱 

I invite you to try this:
👉Spend a few months TRULY practicing these simple habits most of the time. Start with just one, or a few (✨Start small, and add as you feel ready.✨)
👉TIP: Sleep is a great one to start with, because it's the foundation that holds up everything else. 

As you practice these habits, pause and observe:
🤔How do I feel? 
🤔How am I performing, physically and mentally? 
🤔How is my energy?
🤔How do my clothes fit?
🤔How have my longer-term health indicators like blood pressure, cholesterol levels, and blood glucose levels changed?

If you truly desire healthy changes that
✔️feel sustainable
✔️ yield results
✔️ and STICK,
stop relying on willpower!

🌟Focus your efforts on *meeting your needs*, rather than restricting and depriving.🌟
.
Stay in a groove with these habits this month, and you might just discover come January 1st that you feel ready to tackle the new year, no over-the-top diet and intense workout plans necessary! 

👉By then, you'll have already established the habits you need that let your biology work for you for optimal wellness, instead of relying so heavily on willpower.👈

Who's with me?! Will you be KISS-ing your way through the holiday season?? 

#mistletoe #healthyhabits #nourishednotfamished #tinyhabits #atomichabits #wellness #healthy #balancedplate #sleep #stressrelief #circadianrhythm #movement #everythingisconnected #holidays #december #protein #veggies #christmas #nourished #honoryourhunger #ditchthediet #fitover40 #fitover50
The most delicious form of self care: meal prep. 💕 (See stories for deets on this Turmeric Pepper Chicken & Asparagus!) 

During this busy holiday season, your needs often end up on the back burner. 
Which can leave you feeling hangry, exhausted, and ravenous by the end of the day. 
(You know, that feeling when you walk in the door and dive head-first into the bag of chips? #beentheredonethat 🤷‍♀️)

Packing up a few nourishing lunches is a surefire way to boost your midday energy during the week, and leaves you feeling *satisfied* at lunchtime. 

👉 You don't have to make fancy, fussy recipes.
👉 Instead, keep it simple & balanced by packing a lunch container of some protein, fat, carbs, and veggies and/or fruit. Leftover dinner is a great shortcut! 
👉 If takeout is part of your lunch plan, be strategic about ordering meals that will actually nourish you (yup, that means protein, fat, carbs, and veggies and/or fruit).

Is lunch a pain point for you, too?

Would you love the convenience of having it all ready ahead of time?

✨For lunch ideas 
and my top picks for leakproof lunch containers, 
check out my website at link in my bio @nourished.not.famished ✨

Head to "My Favorite Things" section of my site for my top container picks! 

#lunch #whatsforlunch #realfoodfastfood #mealprep #balancedplate #simplenutrition #ditchthediet #tinyhabits
#healthyhabits #poweryourlife #eatingskills #kitchenskills #plantforward #omnivore #fitover40 #fitover50 
.
.
.
.

Copyright © 2022 · Nourished Not Famished